
Getting Started
Version Builder is a Jira app that helps you automatically create release versions based on Git commit messages and issue tracking.
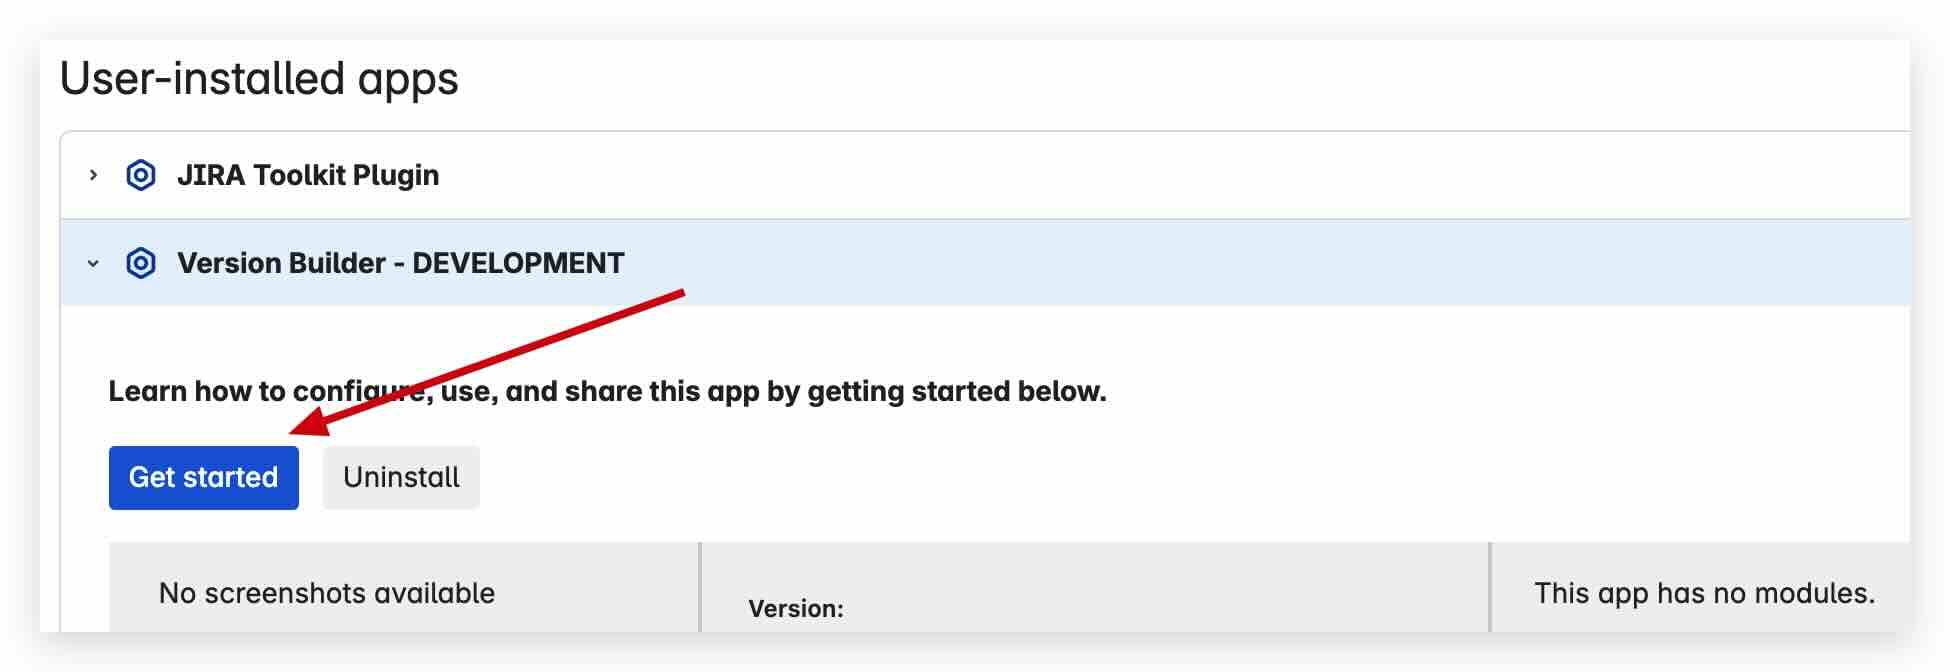
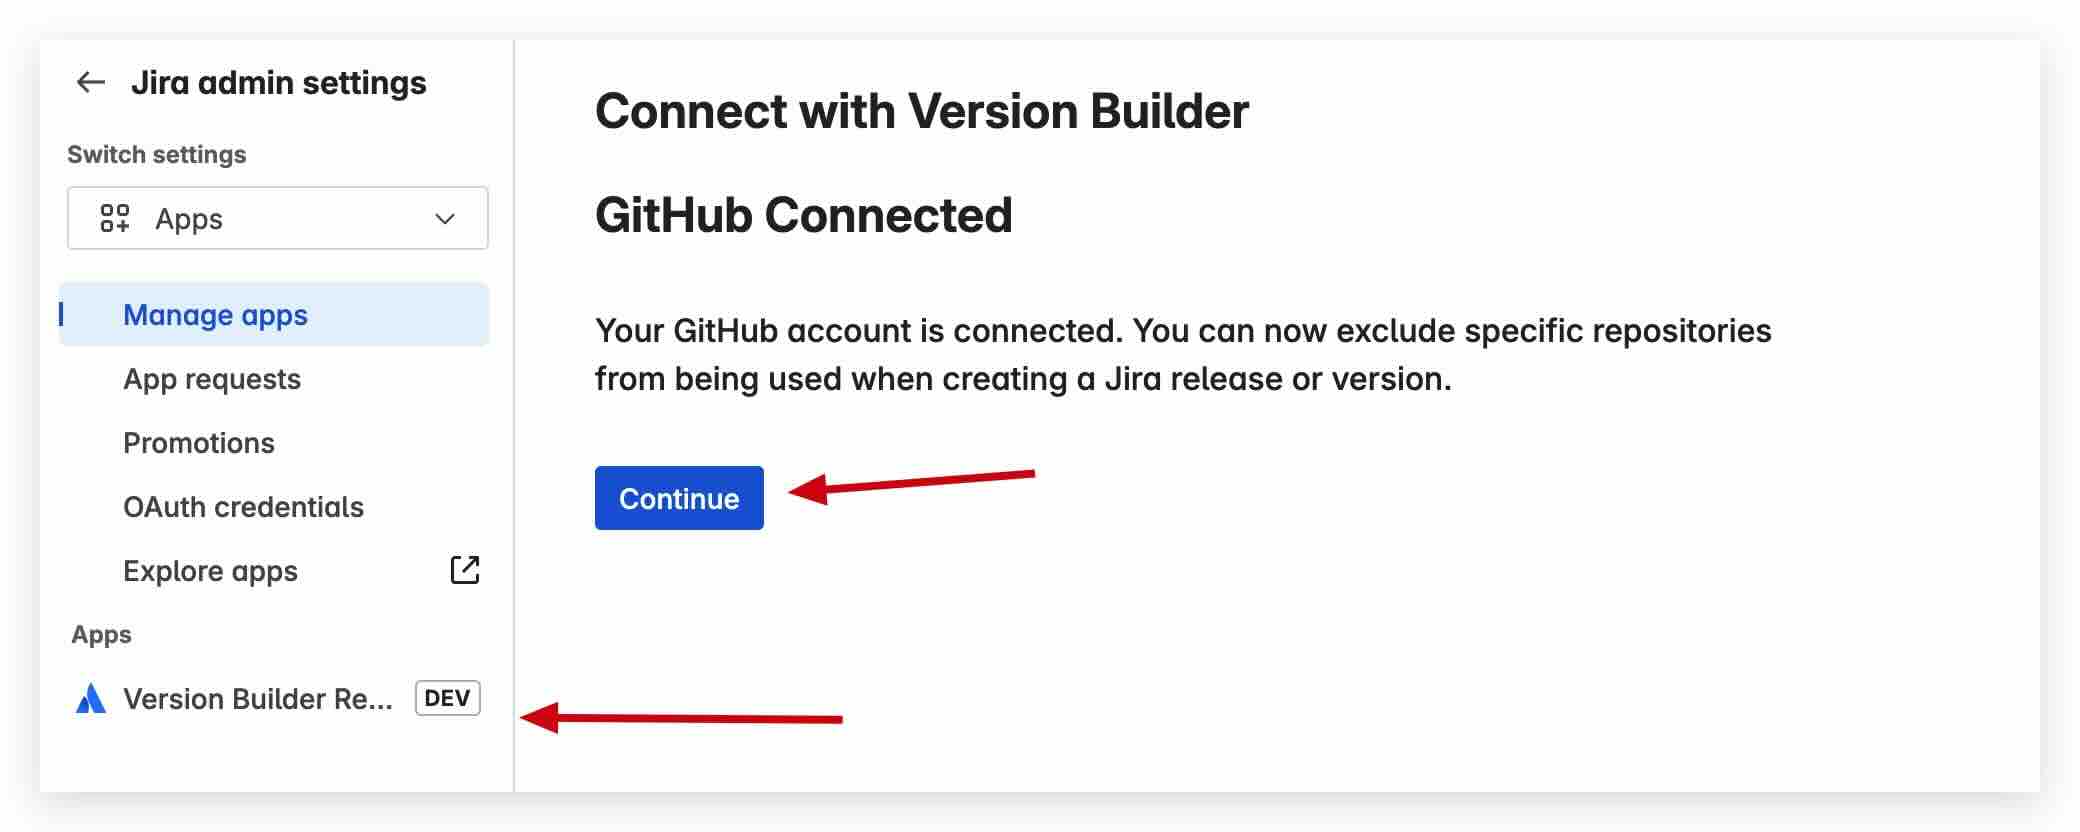
1 Connect Version Builder to GitHub
- Go to Jira Settings → Apps → Manage apps
- Find Version Builder in your user-installed apps
- Click Get started to begin configuration
- Follow the prompts to connect your GitHub account
- Once connected, refresh the page and then click Continue to proceed
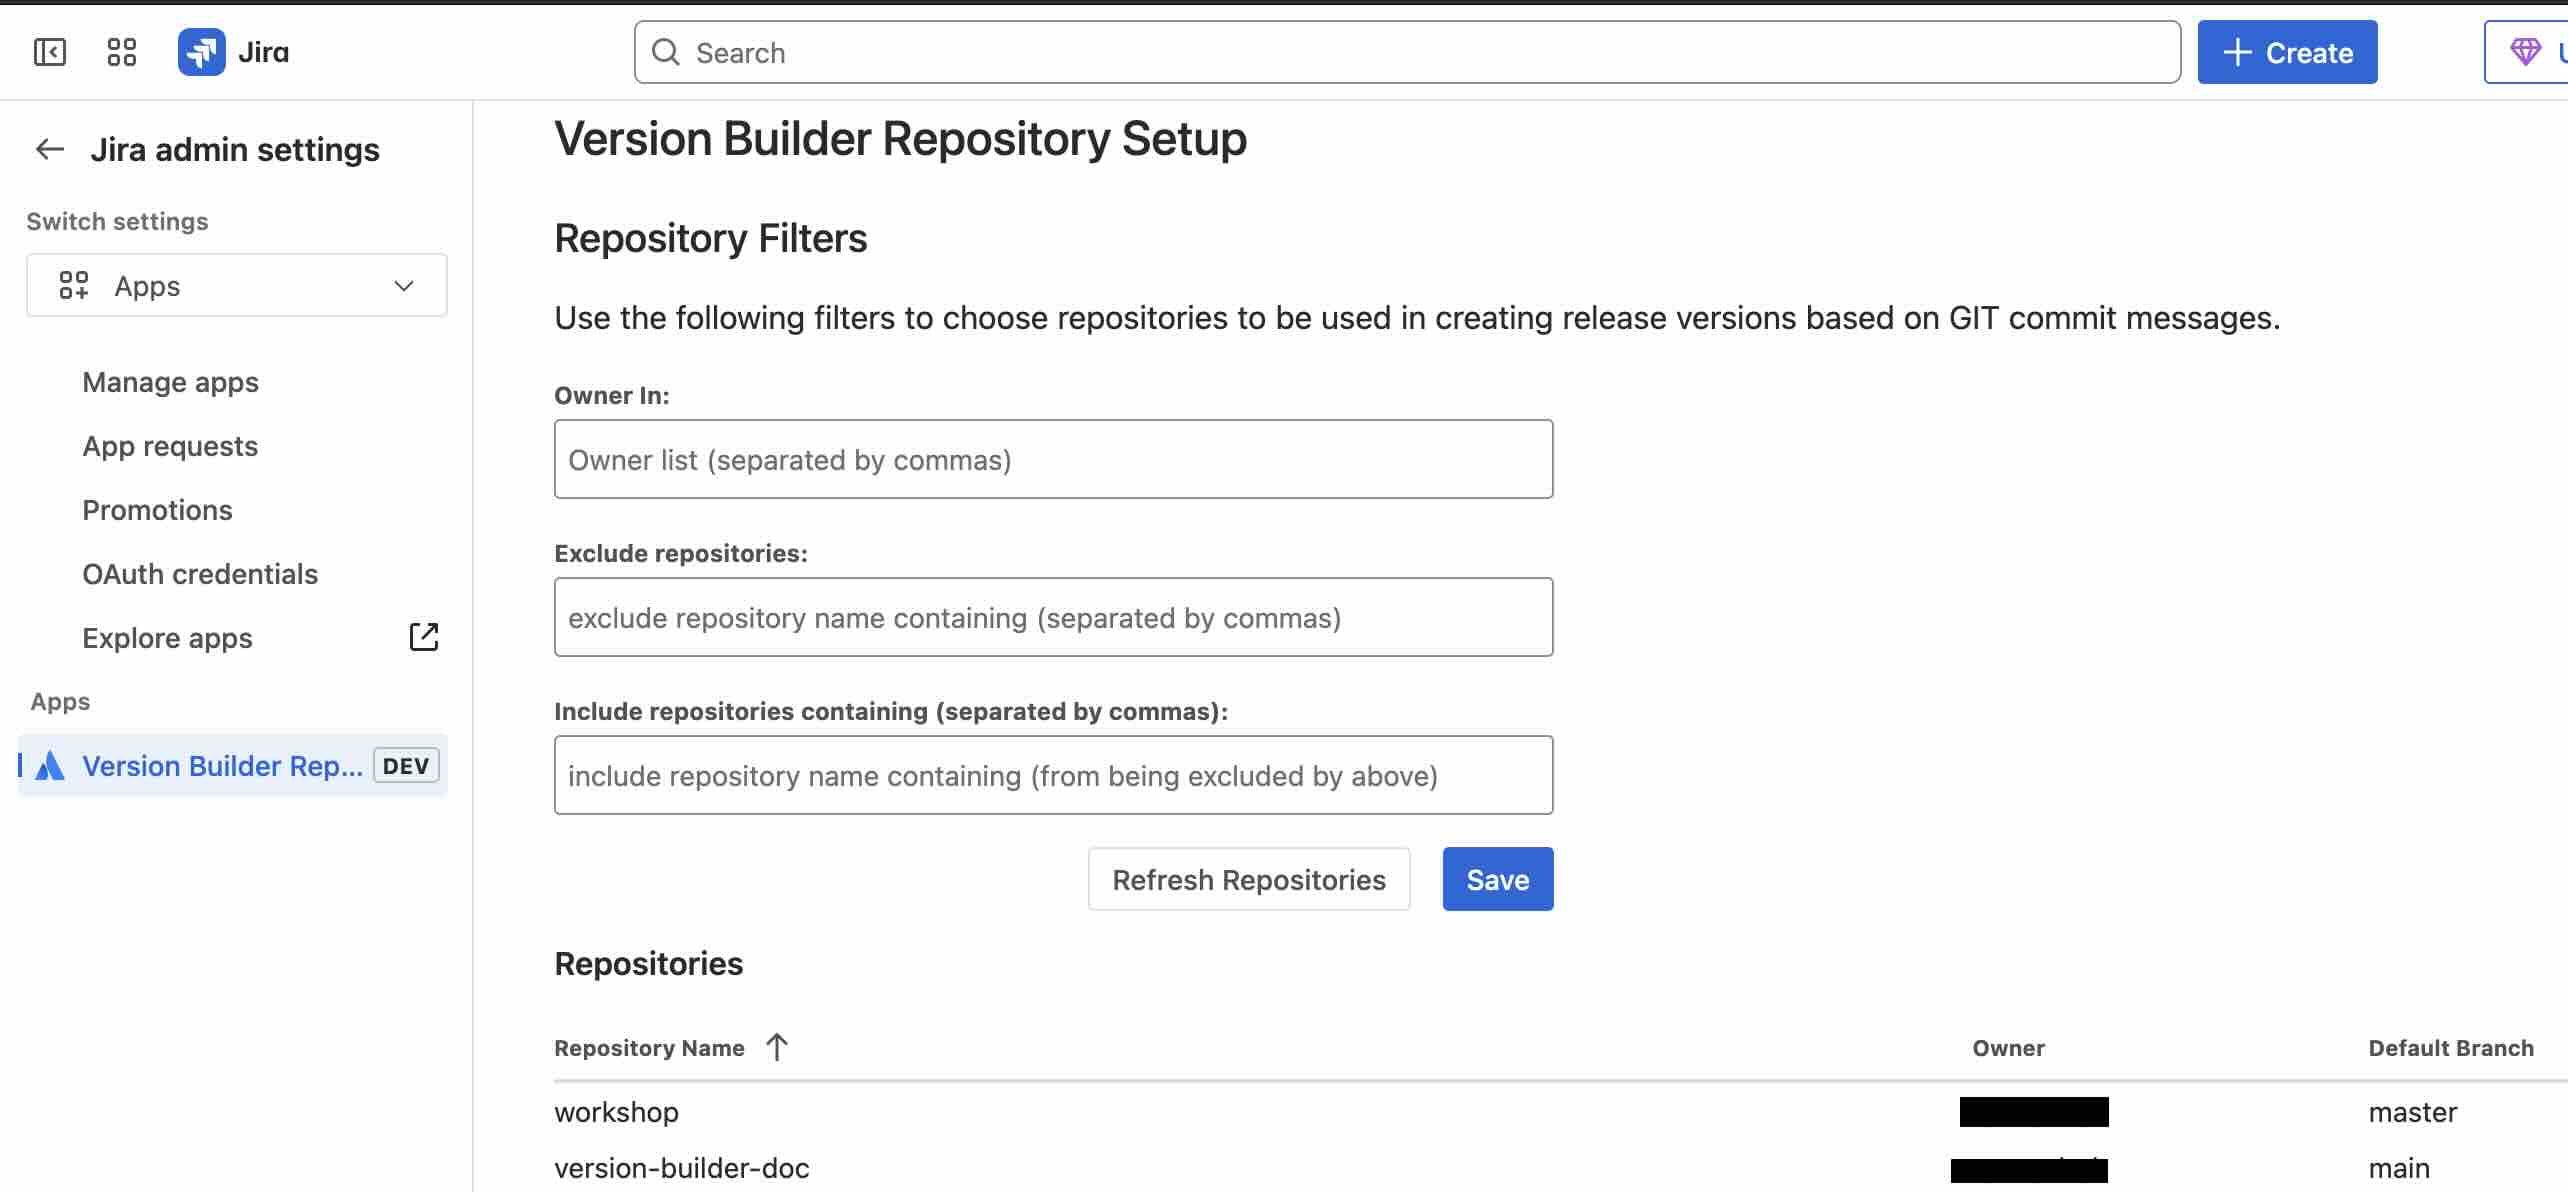
2 Configure Global Repository Filters
After connecting GitHub, you can use Version Builder Repository Setup page where you can:
Owner In
Specify repository owners (comma-separated)
Exclude repositories
Enter repository names to exclude (comma-separated)
Include repositories containing
Add specific repository names to include
To go to the Version Builder Repository Setup page:
- Go to Jira Settings → Apps → Manage apps
- Click the menu Version Builder Repository Setup on the left sidebar

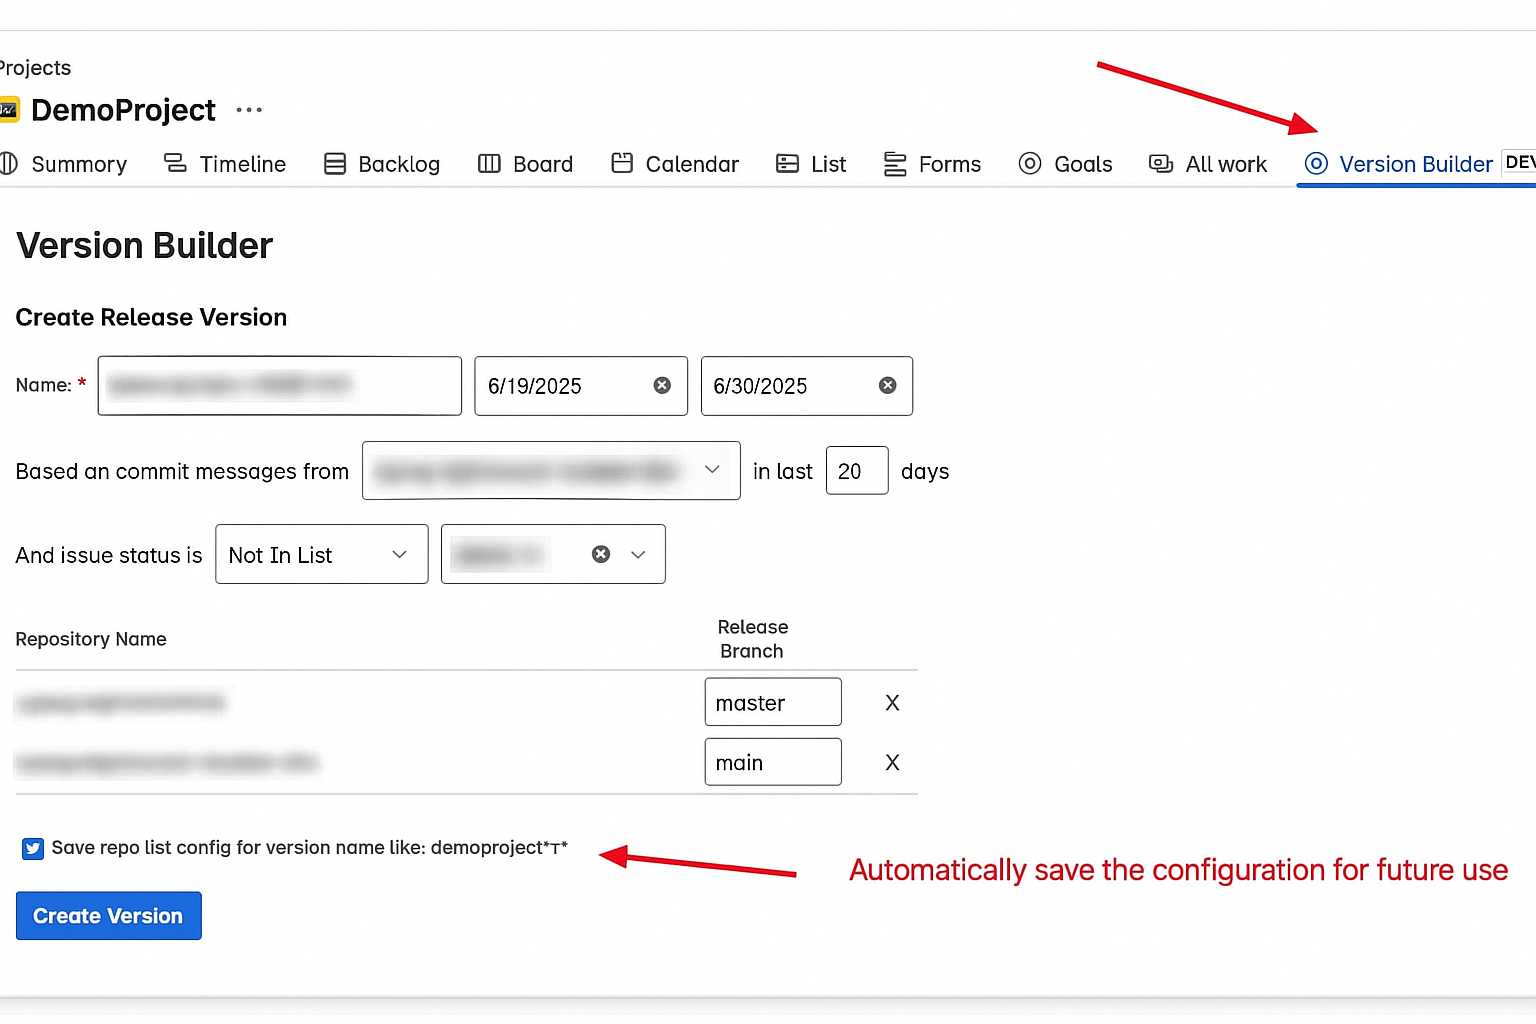
Creating a Release Version
1. Access Version Builder
- Go to your Jira project
- Click on the Version Builder tab in the project navigation
2. Configure Release Parameters
Name
Enter a name for your release version
Repository Selection
Choose which repositories and branches to include
Date Range
Set start and end dates (e.g., 6/19/2025 to 6/30/2025)
Issue Status
Filter by issue status (e.g., "Not In List")
Tip: You can tick "Save repo list config for version name like:" to automatically populate the configuration next time when you create a release with a similar name pattern.
3. Create the Version
- Click Create Version to generate the release
Understanding Git Commit Integration
Version Builder analyzes your Git commits to automatically identify related issues:
Commit Analysis
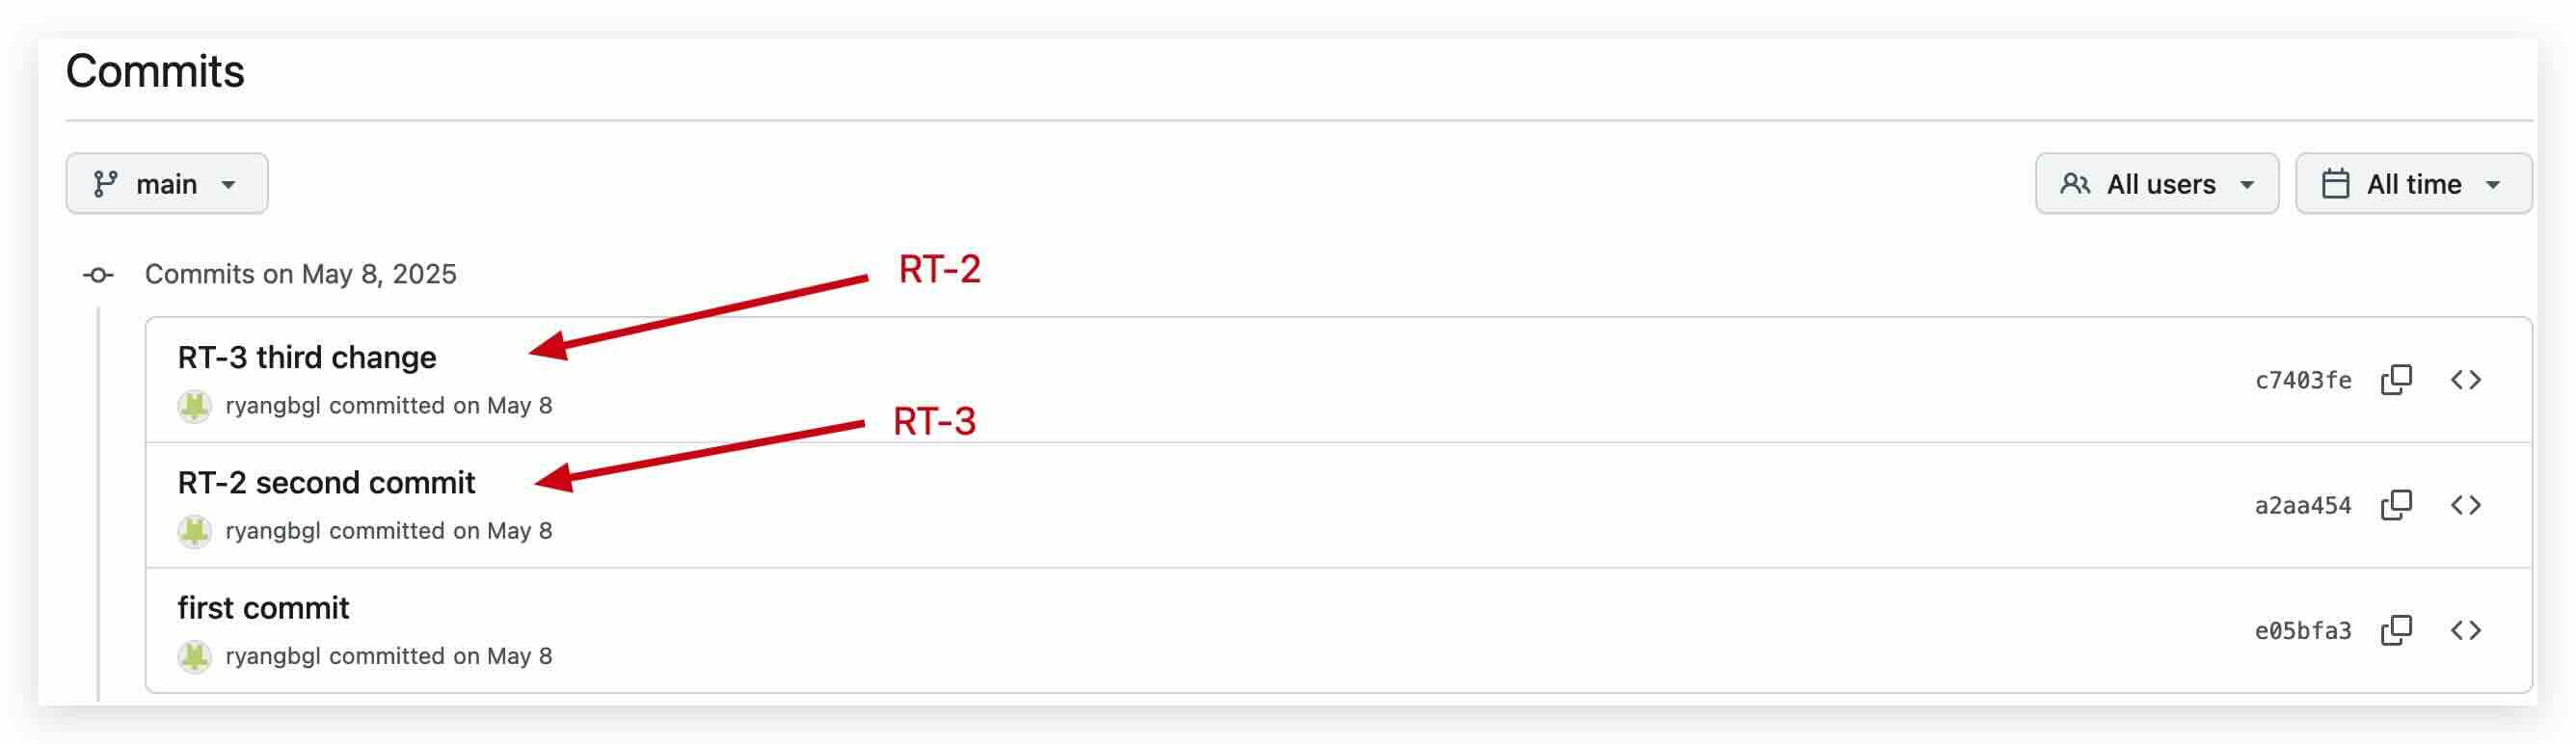
Commits are analyzed for issue references (e.g., RT-2, RT-3)
Issue Mapping
The system maps commit messages to Jira issues
Automatic Inclusion
Issues are automatically included in the release version based on the commit analysis

Managing Release Content
After creating a version, you can:
View Issues
See all issues included in the release (e.g., RT-2 "Implement UI", RT-3 "Implement UI2")
Edit Release Notes
Add custom text, hyperlinks, dates, and formatting
Manage Related Work
Link additional work items to the release
Track Designs
Associate design work with the release
Tips for Success
Use Consistent Commit Messages
Include issue keys (e.g., RT-2, RT-3) in your commit messages for automatic linking
Configure Filters Once
Save your repository configuration to reuse for similar release names
Review Before Creating
Double-check your date ranges and repository selections before creating the version
Customize Release Notes
Add meaningful descriptions and context to your generated releases
Troubleshooting
Repositories don't appear
Check your GitHub connection and repository filters
Issues not being linked
Ensure your commit messages include proper issue references
Missing commits
Verify that your commit message date ranges capture the intended development period
Wrong branch selected
Check that the selected branches contain the commits you want to include
Need additional help? Contact your Jira administrator or send your question to [email protected].